My 2018 in Gaming

Better late than never…

2018 was the first year I’ve managed to consistently track the games I’ve been playing throughout the year. I’m using a Trello board to track games I want to play (Unplayed), am playing (Playing), have played (Beaten), or gave up on (Abandoned)1.

Rather than writing a list of ‘top games’ of the year, and inspired by a couple of my colleagues (#1, #2), I thought I’d instead simply post a summary of the various games I played in 2018 and what I thought of them. I’ve highlighted my favourites with a ⭐️.

Beaten

Shadow of the Colossus (PS4 Remaster) ⭐️

Shadow of the Colossus is easily one of my my favourite games of all time. It’s so simple, yet does such an incredible job of conveying the atmosphere of its empty world. The remaster takes an old game that had really clunky performance, and makes it look and play like a dream.

Celeste (Switch) ⭐️

Celeste is an outstanding indie game, and a deserved contender on a lot of top games of 2018 lists. I got so into it that I stayed up into the early hours of the morning playing the last couple of chapters all in one sitting. I just couldn’t put it down.

Oxenfree (Switch)

A creepy mystery adventure, but pretty slow going.

Splatoon 2 Singleplayer (Switch)

I’ve been playing Splatoon 2 multiplayer since it was released in 2017, but I finally finished up the single player ‘campaign’ at the start of the year. It was fine, I guess? The boss fights were the best part, but I think the main multiplayer modes of Splatoon are good enough that it’s not really necessary.

Subsurface Circular (Switch)

A short game that’s most like an interactive novel, with a few puzzles thrown in.

Darkside Detective (Switch)

A very simple (each scene is mostly static, and you don’t even see the characters walking about) but quite entertaining point and click adventure.

Donkey Kong Country: Tropical Freeze (Switch) ⭐️

I absolutely loved my time with Tropical Freeze. It’s hands-down one of the best 2D (with 3D graphics) platformers ever made. Really inventive, nicely challenging, great to play, and the levels are full of life.

Hollow Knight (Switch) ⭐️⭐️⭐️

Wow. Hollow Knight is my favourite game that I played this year, and is instantly one of my favourite games of all time. It just has so much atmosphere, and it’s great at drip-feeding you abilities and giving you a rush when you realise you can now access some previously inaccessible area. I still shudder when I think about Deepnest…

Captain Toad: Treasure Tracker (Switch)

A cutesy, fun little puzzle game. However, I found that I got bored about halfway through, and there wasn’t enough variety in the levels or mechanics to keep me interested.

Spider-Man (PS4) ⭐️

Probably my second favourite game of the year, after Hollow Knight. It’s an open world game, but the developer didn’t feel the need to make the world too big, or cram it full of too much stuff. It’s managable, in a way that a game like Assassin’s Creed isn’t. I’ve almost 100%ed the main game, which is something I never normally bother to do.

Steamworld Dig 2 (Switch)

A Metroidvania with a digging mechanic. It has quite a tight little gameplay loop, with you revisiting the surface regularly as you dig deeper and deeper, but it didn’t really ever completely suck me in.

Night in the Woods (Switch)

I didn’t enjoy this as much as I’d hoped I would. It looks lovely, and it has a nice atmosphere, but it’s very slow and the ending comes out of nowhere.

Unbeaten

Zelda: Breath of the Wild Champions’ Ballad DLC (Switch)

I really enjoyed Breath of the Wild, but I haven’t been back since I beat Ganon. I started the DLC earlier this year and had a good time with it, but I haven’t played in quite some time. I think it might be tricky to pick it back up. It has a lot of overworld exploration and tasks, which is great for me as I didn’t really enjoy the game’s shrines (and I only ever bothered completing a fraction of them).

Skyrim (Switch)

I’ve played Skyrim on the PC, XBox 360, PS4, PSVR, and now the Switch. One day, I’ll finally finish the main quest.

God of War (PS4)

I’ve really enjoyed God of War so far. In particular, the opening hour or so is like something straight out of a Marvel movie. But for some reason I keep falling off it and I still haven’t got round to finishing it.

Dark Souls (Switch)

After playing quite a lot of Dark Souls, I now see what all the fuss is about. The world, the atmosphere, the combat, the thrill and relief when you finally find a bonfire after attempting an area time and time again. But I put it down to play other games and I haven’t come back yet. The oppressive atmosphere and high difficulty isn’t generally what I’m looking for when I just want to relax with a game in the evening.

Pokémon Let’s Go Pikachu (Switch)

I’ve never finished a Pokemon game. I started with Pokemon Red on the Gameboy, and I’ve picked up a few others along the way – Black, Y, Soul Silver… but I’ve always lost interest quite early on. I’ve got a reasonable way through Let’s Go, and it’s a wonderful update of the original Pokemon Yellow… but I’m very close to dropping out yet again. I think at some point I might just have to accept that I don’t find Pokémon battling very interesting.

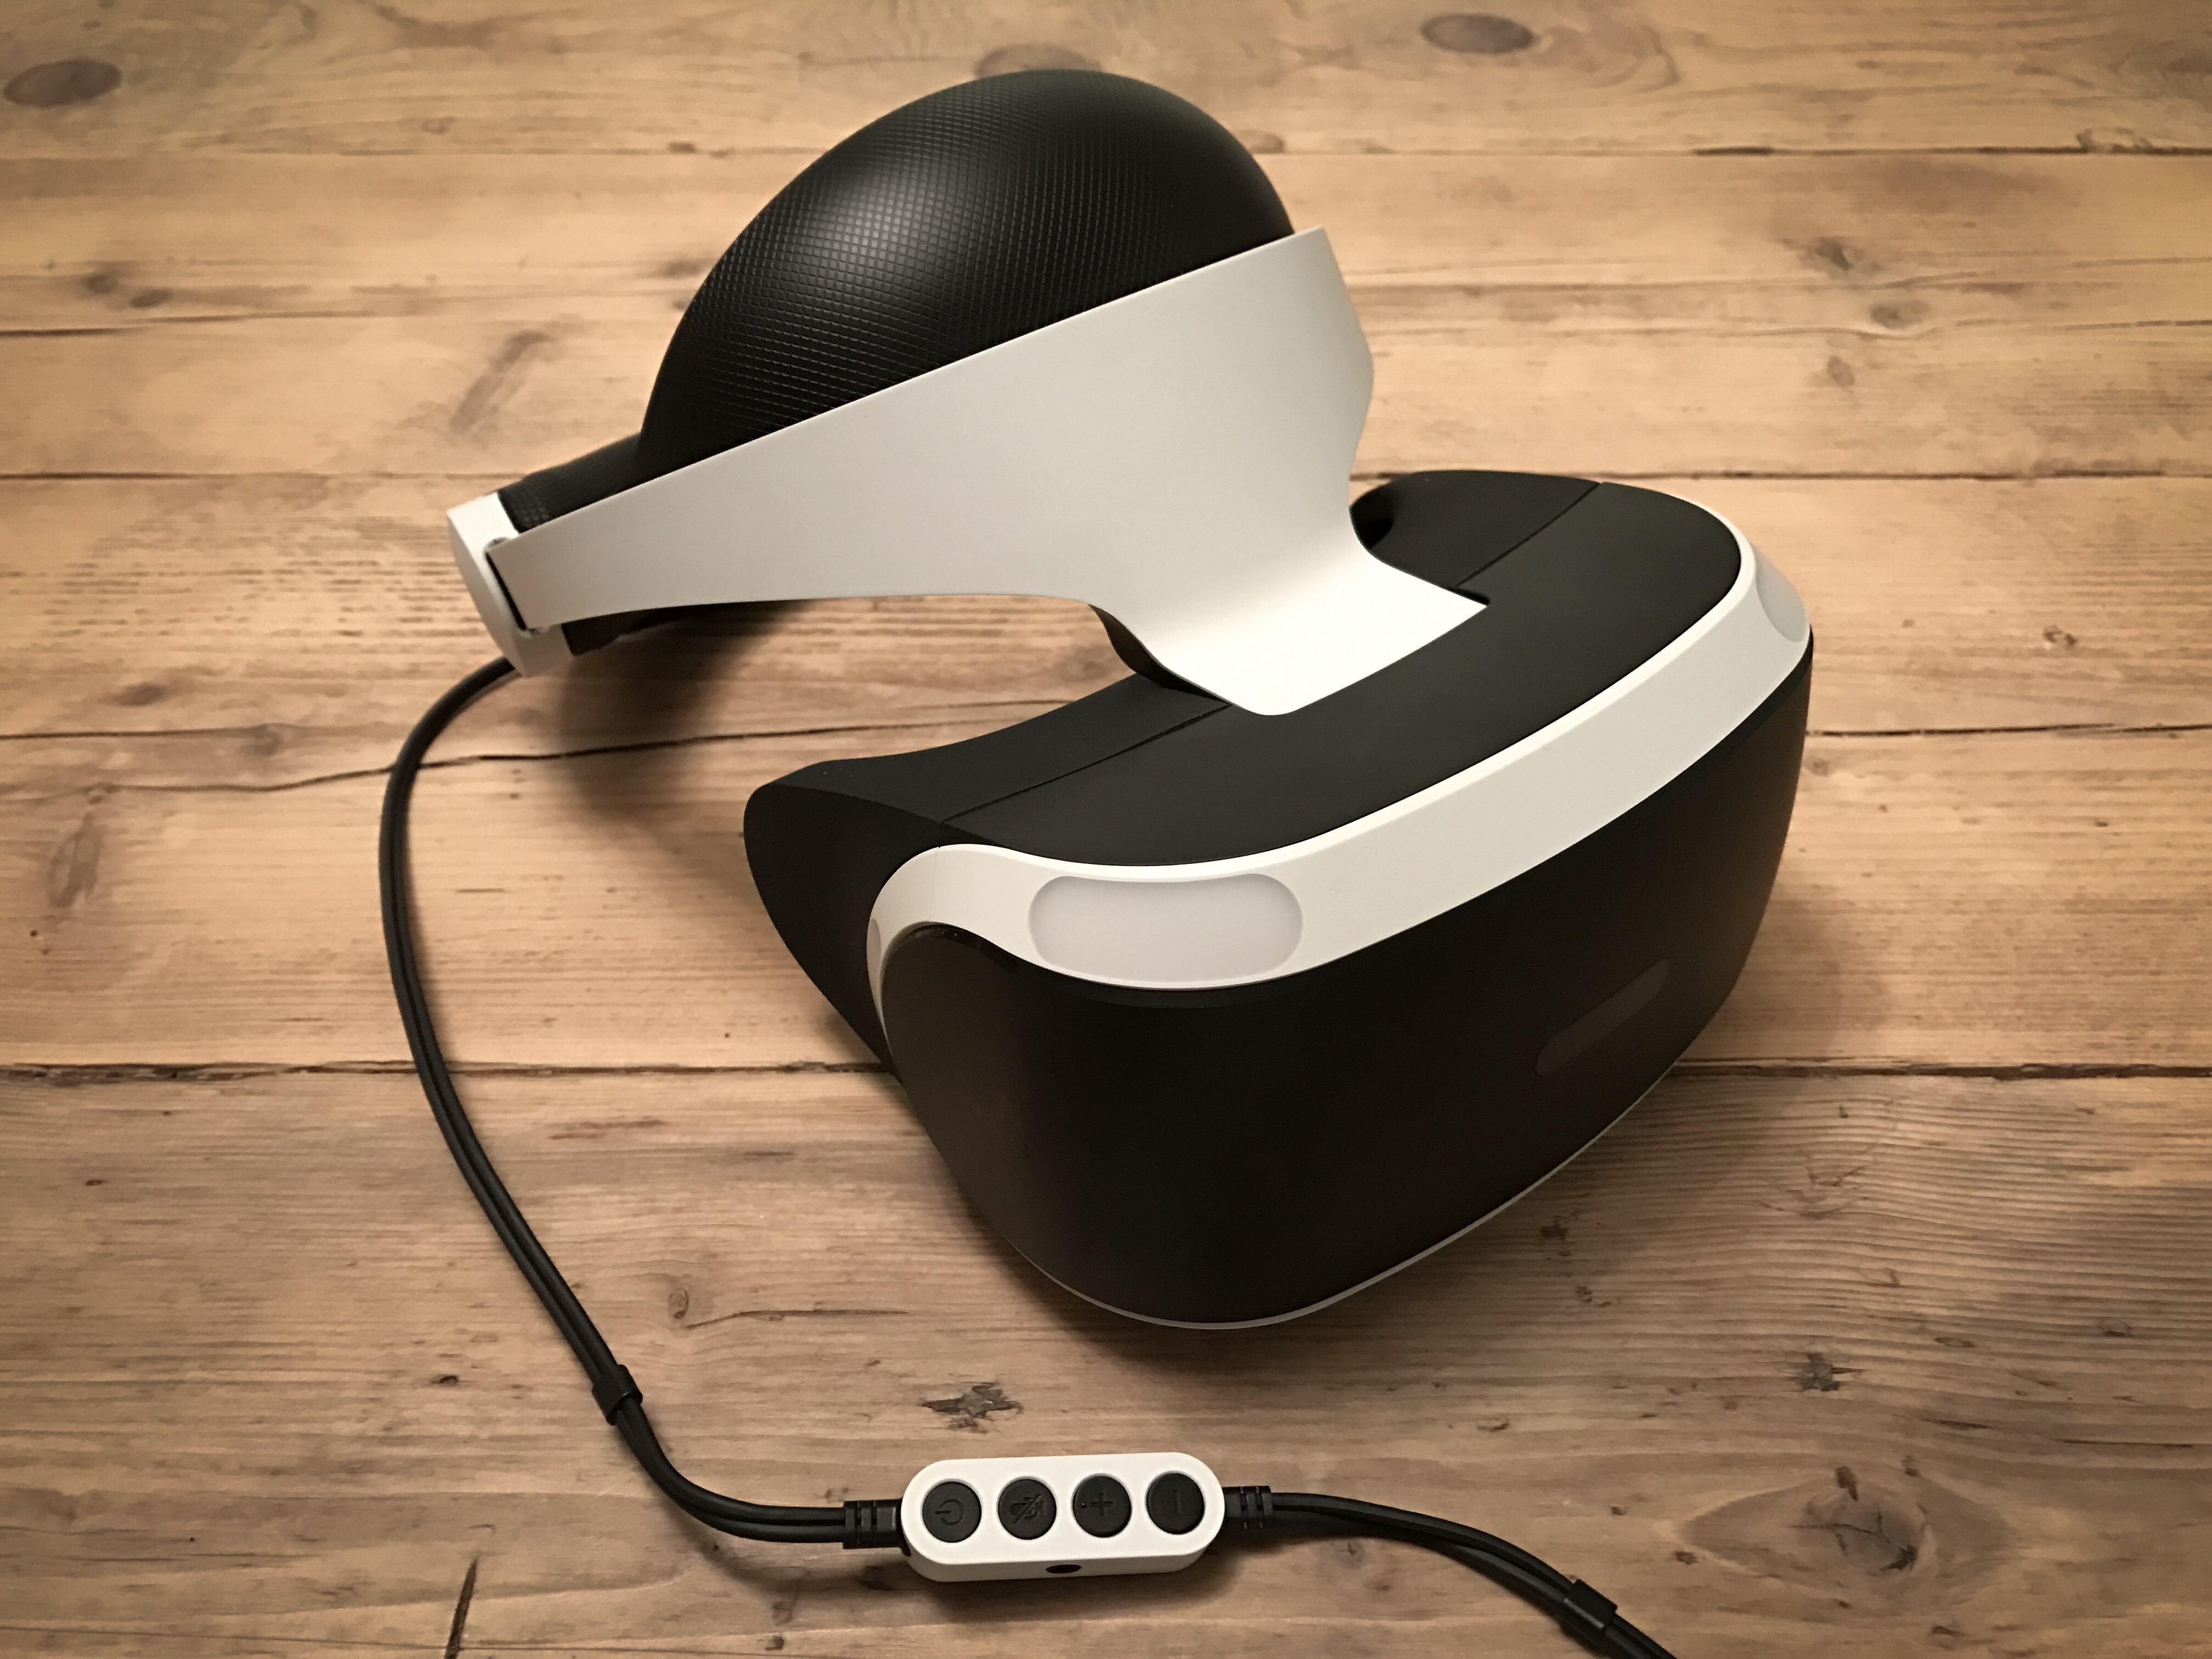
Astro Bot Rescue Mission (PSVR) ⭐️

One of the best things I’ve played this year, and one of the best things I’ve played in VR. Astro Bot Rescue Mission has Nintendo-levels of whimsy, character, and innovation. A must-have if you have PSVR.

Hyrule Warriors (Switch)

I’ve been unsure whether to pick this one up for some time. I’m a big Zelda fan, but I didn’t know whether I’d like the Musou gameplay. Turns out I do! It kind of operates on two levels – the battlefield management sometimes gets quite stressful, but the moment-to-moment fighting is actually quite mindless and relaxing. Plus it’s just amazing Zelda fan service.

Wandersong (Switch) ⭐️

Wandersong is a wonderful (or should that be WANDERful?), original indie title where you play a bard and interact with the world entirely through singing. I put it down for a bit while waiting for a bugfix to be released, but I can’t wait to get back into it and wrap up the story.

The Rest

I picked up a handful of games on the Switch that I’m not actively playing, but I’ll probably continue to dip into now and again: Stardew Valley, Dead Cells, Flinthook, Immortal Redneck, and Hand of Fate 2. I’ve also started but completely abandoned a couple of games, including the Horizon Zero Dawn: The Frozen Wilds (I absolutely loved Horizon Zero Dawn, but I left it way too long to get back into it and I just feel like I’m done with that world), and Bayonetta 2 (completely not a game for me. I really really don’t like the gameplay or the aesthetics).

So: 12 games beaten, 8 still on the go, and a handful abandoned. 2018 was a great year for games, and for me once again it was dominated by the Switch.


  1. Hat tip to Shaun Inman’s Unplayed lists for the original inspiration for this categorisation. 

Losing It

Since the beginning of May I’ve lost over 10kg, many many inches, and I’m probably the fittest that I’ve ever been.

A graph showing my weight change since the beginning of May. Down from 76.9kg, to 66.1kg in 3 months.

I’ve always been quite skinny, and I could get away with eating pretty much anything I wanted without putting on weight. But a couple of years ago I stopped walking to work, and around the same time my wife and I had a newborn baby which meant I was constantly exhausted and paid less attention to what I was eating. Quick and easy was the order of the day. Before I knew it, without even noticing it was happening, I was heavier than I’d ever been, and I was very unfit. Clothing that I’d worn for years was starting to feel very snug, or not fit at all. I finally decided enough was enough.

At the beginning of May, my wife and I began to make a conscious effort to improve our health, lose weight, and get fit. It’s not actually been too arduous, and it’s been made much easier by the fact that we’ve been doing it together. If one of us doesn’t feel like working out on a given day, we offer encouragement. We can help each other track our eating, and share the job of preparing meals. We can push through the harder times and celebrate our progress together.

Anyway, enough of the preamble. You’re probably wondering what we’re doing to achieve our goals. It’s really a couple of fairly small lifestyle practices that add up to some great results.

Diet

Eat Less

It sounds obvious, but the big change here is that we started watching what we’re eating. Counting calories can be a bit of an effort (particularly as we cook most meals from scratch), but we did it for the first month to get a better understanding of our intake. It’s also a tried-and-tested way to lose weight. If you have the right calorie deficit every day, you should lose weight. Now it’s become second nature to have smaller portions and make better choices.

MyFitnessPal has been excellent for tracking calories, and I’d highly recommend it. I used it initially to calculate a daily calorie intake based on my weight, height, activity level, and the rate at which I wanted to lose weight. I aim for around 1500 calories a day. It’s got a huge database of foods, and it’s easy to add anything that’s not already in there. You can even scan barcodes for ease of entry.

Less Carbs

We eat very few refined carbohydrates, which really helps when trying to hit a daily calorie goal. No bread. We don’t really eat any rice, pasta, or potatoes. We make the other parts of our meals a little larger to compensate. For example, just make a bit more curry instead of having rice as well. Very occasionally, we’ll have a small spoon of one of the above with a meal, but often we’ll just replace it with some more veg like broccoli.

My wife and I have never really drunk alcohol much (I could count on one or two hands the number of times we have it in a year) and we never have sugary soft drinks, so that helps – just tea, coffee, and water. If you do drink either, cutting them out most of the time can be a great way to ditch a tonne of empty calories.

Think

Essentially, improving your diet boils down to making better choices. At each meal, particularly if you’re dining out, think about what small tweaks you could make to cut out some calories or make things healthier.

Swap those chips for a healthier side. Have an extra sausage and some more vegetables, but ditch the mash. Have a takeaway, but just don’t have rice with your curry (or share with someone else). I’ll often weigh up the rough calorie cost in my head: “do I really want to ‘spend’ an extra 200 calories on this?”

We still have treats, we just don’t go crazy. To borrow a phrase from Matt Gemmell, we just don’t routinely overindulge.

A lot of people say losing weight is 80% down to diet, and I think that’s pretty accurate. Watching my diet is the main way I’ve lost weight. Exercise is for toning, building a bit of muscle, and generally improving my fitness level.

Exercise

Three pieces of technology have been indispensable to my efforts to get fit: Apple Watch, a website, and a bike.

Apple Watch

The Apple Watch features three daily activity goals: “Stand”, which requires you to stand for 1 minute each hour for 12 hours of the day; “Exercise”, which requires you to do 30 minutes of activity a day; and “Move”, which requires you to hit a user-defined goal for calories burnt each day.

The Activity watch face on the Apple Watch, showing the current time and 'scores' for each of the watch's three daily activity goals: Move, Exercise, and Stand.
When I first got my Watch, I paid attention to these activity rings. I had a 78 day Move streak going (hitting the goal every day). But then I accidentally broke the streak, and I’ve rarely looked at the activity goals since. It seemed such an effort to get back to 78 days.

From the 1st of May, I decided to make a conscious effort to hit every ring every single day. It’s a way for me to force myself to get active each day. Today marks the 100th day of my new streak, and I really don’t want to break it now. I set my calorie goal low to begin with to set myself up for success, and I’ve been increasing it every week.

A notification on the Apple Watch, congratulating the user on reaching a 100 day Move streak.

Nerd Fitness

I’m alternating between two things to hit my activity goals each day. The first is regular body weight strength workouts. We use an online workout plan from the Nerd Fitness Academy. Nerd Fitness provides a simple, structured workout plan which you can do at home with either no or minimal equipment. We’ve worked our way up from ‘bodyweight level 1’, and we’re now at level 3.

Each level offers two or three different workouts which you can alternate between. We aim for 3 workouts a week. Each workout consists of a warmup, 3 or 4 exercises which you normally do in sequence and repeat 3 times, and then a cool down. The whole thing usually takes us no more than 15 or 20 minutes, and we’re both much stronger than we were when we started. It’s been great to see just how much we’ve progressed over the last couple of months.

The exercises are generally very straightforward; things such as push ups, inchworms, one-arm rows, squats, and lunges. Each exercise also has a really short, simple, well made video showing how to do it correctly.

Some days it’s a struggle to start a workout, but one of us can usually motivate the other to get going. It really doesn’t take very long, and we always feel good about it once we’ve actually done it. Our 2 year old son also enjoys joining in and doing his exercises with us.

Exercise bike

My secret weapon in my goal to hit my activity rings every day is my exercise bike. Back at the start of this adventure, with some fantastic advice from Matt Gemmell (you might see a pattern here), I picked up a relatively cheap stationary indoor bike. I primarily use it on the days I’m not doing a strength workout.


It’s so easy just to climb on and crank out some kilometers and burn calories. Even if it’s the end of the day and I haven’t hit my goal, it requires almost zero motivation or energy to just walk over to it, get on, and go. If I was relying on running as my daily exercise, I’d be very reliant on the weather and whether I even feel like getting dressed in the appropriate gear and leaving the house. The bike reduces the barrier to entry, and I can’t recommend it enough. I can even prop my iPad on the console and watch YouTube or Netflix while I ride.

Get Fit With This One Weird Trick

If you’re looking to lose weight or get fitter yourself, hopefully this post has given you some ideas and inspiration.

My inspiration for this post, as well as for me to finally try to get fitter, was Matt Gemmell’s excellent post from a couple of years ago, Workout. Matt went through a similar journey, and the results he saw in six months are just incredible. I highly recommend checking it out.

PlayStation VR

Ever since I first tried VR, I knew I had to own a headset. I finally do, and I’m really pleased with it.

I was more excited leading up to the release of the PlayStation VR than I remember being for any other recent tech product launch. Mine arrived last week and a lot of people have asked me what it’s like, so I figured I’d write up my thoughts.

The headset

The headset itself is really comfortable. The design, build quality, and materials that Sony have used are excellent. The inner padding of the headset is a really nice textured rubber, and it feels great and looks very premium.

The headset is also very easy to put on. No awkward velcro straps like the Vive or Rift. There’s just a sturdy band that fits around your head, and a small dial to turn to tighten it once it’s on. Once it’s in the right place you can slide the actual visor (containing the screen) forward and backward, so you can move it closer to your face and find the ‘sweet spot’ where it’s in focus. Whereas the Vive and Rift screens are pulled tight against your face like a pair of ski goggles, the PSVR comfortably hangs in front of your eyes.

And it works really well with glasses! Sony paid particular consideration to users with glasses, and for me at least it’s very comfortable. Whenever I’ve used a Vive or a Rift in the past, I’d have to put it on in an awkward way to fit around my glasses, and they’d get stuck inside it when I took it off.

There’s a small amount of ‘light leak’ at the bottom of the headset, where you can see the real world if you look down. Apparently this was an intentional design on Sony’s part, to allow people to ‘ground’ themselves if necessary. I have to say that once I’m playing a game, I don’t notice it at all.

Setup was very easy, despite there being quite few cables involved. The cable from the headset to the processor unit1 felt to me to be much thinner and less intrusive than either the Vive or the Rift’s cables. It also contains a useful little inline remote into which you can connect a pair of wired headphones (which receive full 3D audio). The remote allows you to change the volume, turn the headset on and off, and mute or unmute the headset’s microphone.

The screen

I’m impressed by the quality of the PSVR’s display. The colours are great, it’s bright, and there’s little to no screen door effect2. It’s not the highest resolution (it’s marginally lower than the Vive and the Rift), but I can live with that as it’s just a reality of where VR tech currently is.

It also seems like it’s the games that are mainly letting things down on the resolution front – in a game that’s rendering at a resolution higher than that of the panel (‘supersampling’), such as Job Simulator which runs at 1.4x resolution, things look quite sharp. Other games are clearly running at a lower resolution in order to get the required performance, and it shows. EVE: Valkyrie in particular gets very blurred at a distance, and whilst I haven’t played it I’ve heard that Drive Club has big resolution issues. I think the PS Pro should help in this regard, as it’ll allow games to render at higher resolutions.

The only other issue I have with the screen would be that it has a fairly prominent ‘mura effect’ in dark scenes. This is where you can see a random pattern of slightly lighter coloured pixels across the screen. It essentially means that dark / black scenes aren’t truly black, and instead are like looking at a dark grey textured pattern which moves with your head. It’s not awful, and it’s easy to look past, but it’s there.

The experience

If you’ve never experienced VR for yourself, it’s difficult to convey what it’s like. Not only does the game surround you everywhere you look, but the sense of depth and scale is incredible. It’s like nothing else. The head tracking on the PSVR generally works really well; the framerate is excellent, and the gameplay very smoothly follows your head movement.

Head tracking in general works well, and rotational tracking (tilting your head to look in different directions) is certainly spot-on. I’ve had a few small issues with positional tracking (your 3D positioning in the world, as you move forward / backward / left right) in some games and when sat further away from the camera. In particular, in the demo of Job Simulator, the environment around me continually moves forward and back slightly whilst I’m stood still, which can result in you feeling a little weird / drunk.

Both headset and controller tracking3 rely on the PlayStation Camera (required for PSVR, but not included with the headset) tracking the visible light from their bright LED strips. Occasionally the controllers also suffer from some ‘jitter’, and if their LEDs aren’t visible to the camera they can disappear in games entirely. For the most part it works well enough, although one can certainly question Sony’s decision to base fairly critical parts of PSVR on slightly flaky 6 year old technology (although presumably cost was a big factor). Having used both the Oculus Rift and HTC Vive, I can say that both of their tracking systems are rock solid in comparison.

The tracking is my only real complaint about the whole experience, and it’s not enough to put me off PSVR or rely detract from gameplay at all. Most of the time it’s fine, and I think as a more technical user I’ve actively been analysing how well things perform and looking for problems. Most people probably won’t even notice.

Final thoughts

Ever since I first tried VR, I knew I had to own a headset. I finally do, and I’m really pleased with it.

Sony have done a good job of delivering convincing, immersive VR at a much lower price than either the Vive or the Rift. And that’s just the cost of the headset – I also don’t need to buy or maintain an expensive PC, which is a huge plus for me. Whilst the visuals may take a bit of a downgrade, and the tracking isn’t as good, it’s plenty good enough to fool your brain4 and there are some fantastic games and ‘experiences’ available.

In fact, I think one of PSVR’s stand out features (besides cost and easy of use) is that it has a great lineup of launch titles. In the next post, I’ll give a brief opinion on each of the games I’ve tried so far.


  1. A small box that connects to your PS4, which handles splitting the HDMI signal to the TV, 3D audio, and the PSVR’s ‘cinematic mode’. 
  2. Screen door effect is where you can see black lines between the pixels of a VR headset (hence it’s like looking through a fine mesh / screen door). Apparently the PSVR largely avoids this due to having full RGB subpixels, although I don’t really understand the technicalities of it. 
  3. The standard Dual Shock 4 and the PlayStation Move controllers can be used in various games, and they often have a virtual representation in the game. 
  4.  I’ve not suffered from any motion sickness from PSVR (although many people do get it from certain VR experiences), but it’s triggered my fear of heights many times. Whilst I know there’s no danger – I’m sat in my living room, after all – the experience is convincing enough for my brain to momentarily go AAAAAARRGGH. It’s kind of fun though. My favourite is currently in RIGS, where you get launched 60 foot into the air out of your RIG whenever it explodes. 

WWDC 2016 Developer Tidbits

A collection of some of the smaller Xcode, iOS, and watchOS changes I’ve come across whilst reading Apple’s updated developer documentation during WWDC.

There were some nice announcements from Apple at WWDC yesterday, including a revamped lock screen and notifications for iOS, SiriKit, and a lot of iMessage integration. Whilst scouring the newly-released developer documentation I’ve come across a lot of interesting tidbits that aren’t headline features on their own, so I thought I’d collect them here in case they’re of use to anyone else. In no particular order:

Xcode

  • Some nice improvements to Interface Builder. You can now edit your UI at any zoom level (FINALLY)! The UI for customizing layouts for different device traits has also been revamped, and looks really good.
  • Image and colour literals are now supported in Swift code, including code completion for images that’re in your asset catalog. Simply start typing either color or UIImage.
  • There’s a new monospaced code font in Xcode: SF Mono that seems to match up with the WWDC promo material this year.
  • The simulator features a special version of the Messages app which allows you to see both halves of a conversation between two users. Very useful for testing all the iMessage newness.
  • Xcode 8 supports both Swift 2.3 and Swift 3. If you choose Swift 2.3 for a project, there’s a new build setting that gets set to Yes: “Use Legacy Swift Language Version”.
  • The new memory debugger looks incredible. You can visualize the current object graph, and it can help identify memory leaks / retain cycles.
  • Xcode now highlights the active line when editing.

Foundation

Notifications

  • The User Notifications UI framework lets you customize the appearance of local and remote notifications when they appear on the user’s device.
  • You can also intercept push notifications (through UserNotifications.framework) and handle them before they alert the user. For example, you could download a video and then tell the user it’s ready.
  • Rich notifications are currently only optimized for 3D Touch, and they’ll be providing access to functionality for users of other iPhone models / iPad at a later date.
  • A lot of the existing remote and local notification methods on UIApplication (as well as UILocalNotification itself) are now deprecated in favour of the UserNotifications framework.

UIKit

Core Data

  • NSPersistentContainer looks like it might replace the simple CoreDataStack class I’d add to most new projects. It encapsulates the whole core data stack, and has convenience methods for creating new background contexts and performing background tasks.
  • NSManagedObject gets a few new methods – init(context:), fetchRequest(), entity().
  • Xcode should be able to automatically generate classes for Core Data entities, but I’ve been unable to get this to work so far.
  • NSManagedObjectContext now has an automaticallyMergesChangesFromParent property to do the NSManagedObjectContextDidSaveNotification observation and merging automatically.

Swift Playgrounds

  • On iPad, XCPlayground is replaced by PlaygroundSupport.
  • You can record videos of coding sessions right inside the app (in the Share menu).

watchOS

  • Glances have gone completely in watchOS 3. Your app should now display and update glanceable information when the user has it in their Dock.
  • If the user has your complication on their watch face, your app will be kept in a ready-to-launch state.
  • WKCrownSequencer lets you directly access information about the crown’s state – whether it’s rotating, how fast, and when it’s stopped.
  • SpriteKit and SceneKit on the watch is cray-cray. The State of the Union contains a cool demo where a notification on the watch contains an animated 3D SceneKit scene.
  • You can now access information about the watch’s orientation, crown position, wrist location, etc in WKInterfaceDevice
  • If you’re using a watch app, whenever you lower and raise your wrist, you’ll get taken right back into the app, for up to 8 minutes.

SiriKit

  • SiriKit is limited to only certain domains:
  • Audio or video calling
  • Messaging
  • Sending or receiving payments
  • Searching photos
  • Booking a ride
  • Managing workouts

Misc

  • If you’ve indexed content for your app with Core Spotlight, you can now search it programmatically in-app using CSSearchQuery. A user can also continue a Spotlight search inside your app.
  • Speech recognition is now possible, through the Speech framework and SFSpeechRecognizer.
  • You can set an expiry or exclusions for pasteboard data for the new universal clipboard.
  • iOS 10 drops support for the iPhone 4S, iPad Mini, iPads 2 and 3, and the 5th generation iPod touch.

Two Nifty Swift Loop Tricks

This week, I learnt two things about Swift that I’d never come across before. Both involve loops.

The first, via Erica Sadun: you can use case let in a for loop to conditionally bind optionals or cast items. Here’s the optional binding example from Erica’s post:

let items: [String?] = [nil, nil, "Hello", nil, "World"]
for case let item? in items {
    print(item)
}

Check out the full post, 3 simple for-in iteration tricks for some other neat tricks.

Secondly, from this post at KrakenDev: you can label loops in Swift! Here’s an example:

sectionLoop: for section in sections {
    rowLoop: for row in rows {
        if row.isMagical {
            break sectionLoop
        }
    }
}

Who knew?! There are a bunch more useful tips in the full post, Hipster Swift, including descriptions of what @noescape and @autoclosure actually do.

New Year, New Job, New Blog

wpcom-wmark

Okay, so we’re already a month into 2016, but I’ve been a bit busy. 🙂

At the end of November, I left my job of 3+ years as a senior iOS developer at Mubaloo to join Automattic as a Mobile Wrangler.

In case you haven’t heard of them, Automattic is most well known for WordPress.com. They’re also responsible for Simplenote, a simple note storage service which I’ve used since the early days of the iOS App Store.

As a Mobile Wrangler1, I’ll be primarily working on the WordPress iOS app (which, as with a lot of Automattic’s products, is open source).

Automattic is an incredible company to be part of. Their mission is to democratise publishing, providing a platform for anybody to have a blog or website. The entire company is distributed across the world, with employees in 43 countries. Pretty much everybody works from their own homes (although if you want to work from a coffee shop or a coworking space, that’s cool too) and sets their own schedules. With a 1 year old son at home, I’m so grateful that I’m now at home all day; I get to see him so much more than I used to, we can all have lunch together, and I can work a schedule that suits my family.

I’ve also converted this site (which hasn’t received much love recently) over to WordPress, and I hope to begin writing here again soon.


  1.  At Automattic, you actually choose your own job title. Mobile Wrangler is what most of the mobile developers go by, although there’s definitely a Pokémon Trainer amongst the ranks too. 

Fixing Xcode’s Invisible Cursor

When writing code, I generally like to use a dark theme in my IDE or text editor. For Xcode, I really like the Tomorrow Night and Seti themes in particular (both of which can be easily installed using the Alcatraz package manager).

In Xcode, however, there’s a slight problem for dark theme fans:

xcode_beam.png

By default the ‘i-beam’ mouse cursor in the editor is really hard to see, particularly on a high resolution monitor. I’d often find myself losing it and having to shake the mouse to activate El Capitan’s mouse zoom feature.

But there’s a solution! I noticed that Terminal.app’s i-beam cursor has a stronger shadow, which makes it easier to see on dark backgrounds. The cursors are just .tiff image files, so it’s trivial to steal Terminal’s cursor and stick it into Xcode.

If you want to do it manually, you’ll need to copy /Applications/Utilities/Terminal.app/Contents/Resources/ShadowedIBeam.tiff over the top of /Applications/Xcode.app/Contents/SharedFrameworks/DVTKit.framework/Versions/A/Resources/DVTIbeamCursor.tiff. Or you can just run this snippet in Terminal, which will do it for you:

cd /Applications/Xcode.app/Contents/SharedFrameworks/DVTKit.framework/Versions/A/Resources; sudo mv DVTIbeamCursor.tiff DVTIbeamCursor.old; sudo cp /Applications/Utilities/Terminal.app/Contents/Resources/ShadowedIBeam.tiff DVTIbeamCursor.tiff

The change in shadow is actually only slight, but I find it makes a big difference in helping me locate the cursor:

terminal_beam.png

And here’s a before and after:

before_and_after_beams.png

Update: On Twitter, @TwoLivesLeft pointed out that iTerm’s cursor has even better contrast:

Update 2:Also on Twitter, GregHeo, there’s a super-mega visible cursor available on Github: https://github.com/egold/better-xcode-ibeam-cursor

The Just Checks Today Widget

Inspired by Shawn Blanc’s “The Just Checks” episode of The Weekly Briefly podcast.

The Just Checks are those times throughout the day when we ‘just check’ our phones: skim over our Twitter feeds, browse RSS, check our emails, etc. In Shawn’s words:

… as soon as I’m holding my phone, it’s instinct at this point to swipe-to-unlock the thing. And then, once the phone is unlocked and I’m staring blankly at my Home screen of icons, I’m going to want to launch an app. But because I unlocked the phone without any clear plan for what I needed to do, the next thing I know I’m checking Twitter. And all the while, I don’t even know what time it is. See? It’s a bad habit.

I built this widget to help limit my own bad habits of ‘just checking’ Twitter and RSS many many times throughout the day. Apple doesn’t allow widgets on the App Store that launch other apps, so I’m releasing the code on Github in case anybody else wants to try it out for themselves. The widget is currently set up to work with Tweetbot and Unread, and uses their URL schemes to launch the apps.

The Just Checks Today Widget

The idea is this: the widget displays an icon for Tweetbot and an icon for Unread. When an icon is tapped, the associated app is launched. The widget then keeps track of the amount of time since you launched that app. There’s a timeout set so you can’t relaunch an app through the widget more often than once every hour (because really, why should you need to?). I’ve also hidden my Tweetbot and Unread app icons away in a folder on the last home screen on my phone. This adds enough extra friction that I’m more likely to use the widget to launch my apps.

In the short time I’ve been using the widget, I’ve found that seeing the timer when I go to launch an app has been really effective at getting me to just put my phone back in my pocket. I’ve even caught myself going to check Twitter and realising that I’d only checked it 5 minutes ago, when I could’ve sworn it was much longer. I’ll stop in my tracks, lock my phone, put it back in my pocket, and get on with my day.

Also worth checking out: Shawn Blanc’s Alternatives to The Just Checks.

Code for the widget is available on Github.

Calculating App Store Spend

I like buying apps. Perhaps it comes from being an app developer myself, but I like to pay for apps that I enjoy and that I get value from. Designing and building an app takes a huge amount of work, and I hope that paying for an app means that it’s more likely to receive updates in the future.

I’ve recently had a couple of conversations with people who have never paid for an app, which made me curious about just how much I’ve spent over the years. Unfortunately Apple provides no easy way to see this information. but they do send out regular receipt emails when you make a purchase. I’ve always archived these emails in my Gmail account, so I put together a small script to parse them and produce some figures. I mentioned it on Twitter and a number of people showed interest in it, so I thought I’d reproduce it here.

The steps below outline how I retrieved my own emails and ran the numbers; of course, everybody’s setup is different but hopefully you’ll be able to adapt them to your needs. I use Gmail as my email provider and OS X as my operating system, so all of the instructions are specific to that setup.

  1. First of all, you’ll need to tag all of your iTunes receipts with a unique tag. I have a filter set up for the following search, which tags all matching emails with iTunesReceipts:

    from:(itunes store) subject:(your receipt no.*)

  2. Next, download all of your iTunes receipts as .eml files. I used Gmvault to download mine. Grab the tool and extract it. I used the following command to fetch the relevant emails:

    gmvault sync --type custom --gmail-req "in:iTunesReceipts" your_email_address@gmail.com --no-compression

    By default, Gmvault will download the emails into a directory named gmvault-db/db in your home directory.

  3. Nowcd into the Gmvault db directory. You can then either manually download my parser script from the [Github Gist] and run it, or download and run automatically in a single command:

ruby -e "$(curl -fsSL https://gist.githubusercontent.com/frosty/b6d1615dab5544fc22b0/raw/e4e3b48b032079e188c8d3f246b2609b83995558/parser.rb)"
  1. The script will first ask for the currency symbol your emails will use; it defaults to ‘£’ if you just press enter. It should then output a count and combined spend for iOS apps and in-app purchases. It’ll also create a tab-separated file named Apps.tsv, which will contain a list of all of your purchases. You can open this in a text editor or a spreadsheet app like Numbers if you want to.

Notes

  • The script could probably be much neater, but I don’t work with Ruby very often and I just threw it together in an evening!
  • I make no guarantees that this script catches everything or that it doesn’t pick up any false positives. The iTunes receipt format is quite awkward and inconsistent and has changed quite a lot throughout the years. Based on my own receipts, however, this seems to do a pretty good job.
  • If you have a suggestion for ways to improve the script, feel free to fork it on Github!

So how much have I spent on apps? Turns out, it’s rather a lot. But when I average my spend out over the life of the App Store, and consider the amount of value and enjoyment I get from the various apps and games I’ve bought over the years… I think it’s a pretty good deal.

Multitouch with Haxe NME

I’ve been getting really interested in Haxe NME recently. Haxe is an open source cross-platform language, and NME adds a display framework on top of that which is modelled very closely on Adobe’s Flash API. The beauty of it is that you can write one codebase and then compile it to native code for Flash, HTML5, Windows, Mac, Linux, iOS, Android and more.

Haxe NME screenshot

I was trying to get to grips last night with handling multitouch input using NME, and I struggled to find a decent example. I managed to get something working and so I put together an example myself which I’m sharing here. It’s a simple example which tracks each distinct touch point and displays a randomly coloured circle beneath that touch. I’ve tested it on iOS and Android.

Grab the source from Github