When writing code, I generally like to use a dark theme in my IDE or text editor. For Xcode, I really like the Tomorrow Night and Seti themes in particular (both of which can be easily installed using the Alcatraz package manager).
In Xcode, however, there’s a slight problem for dark theme fans:
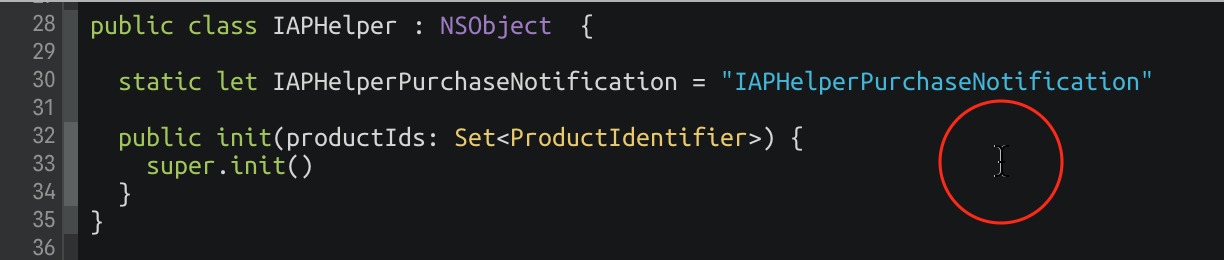
By default the ‘i-beam’ mouse cursor in the editor is really hard to see, particularly on a high resolution monitor. I’d often find myself losing it and having to shake the mouse to activate El Capitan’s mouse zoom feature.
But there’s a solution! I noticed that Terminal.app’s i-beam cursor has a stronger shadow, which makes it easier to see on dark backgrounds. The cursors are just .tiff image files, so it’s trivial to steal Terminal’s cursor and stick it into Xcode.
If you want to do it manually, you’ll need to copy /Applications/Utilities/Terminal.app/Contents/Resources/ShadowedIBeam.tiff over the top of /Applications/Xcode.app/Contents/SharedFrameworks/DVTKit.framework/Versions/A/Resources/DVTIbeamCursor.tiff. Or you can just run this snippet in Terminal, which will do it for you:
cd /Applications/Xcode.app/Contents/SharedFrameworks/DVTKit.framework/Versions/A/Resources; sudo mv DVTIbeamCursor.tiff DVTIbeamCursor.old; sudo cp /Applications/Utilities/Terminal.app/Contents/Resources/ShadowedIBeam.tiff DVTIbeamCursor.tiff
The change in shadow is actually only slight, but I find it makes a big difference in helping me locate the cursor:
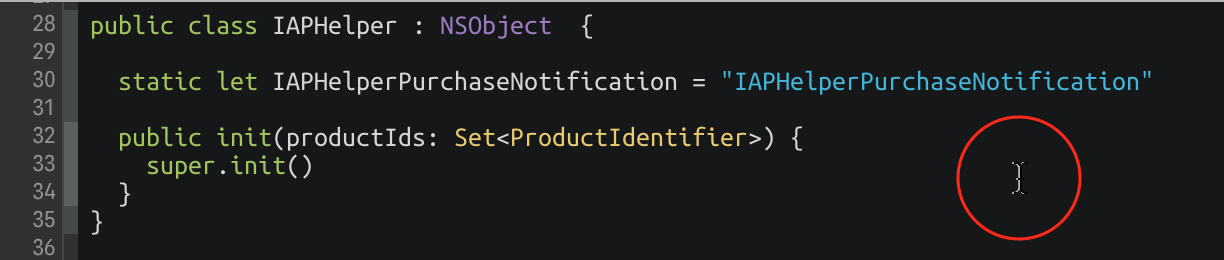
And here’s a before and after:

Update: On Twitter, @TwoLivesLeft pointed out that iTerm’s cursor has even better contrast:
Update 2:Also on Twitter, GregHeo, there’s a super-mega visible cursor available on Github: https://github.com/egold/better-xcode-ibeam-cursor